Viewing entries in
Photography Tips

Comment

Taking Better Photos on Your Phone

Up until recently, we'll be honest and say 90% of our every day photos are taken on our phones. As photographers with really good cameras, you may think why would we opt for using our phones over expensive cameras? And the reason is simple. We are full-time mums and our lives are busy. We simply use what we always have on us. It's easy and convenient, and that's what you need if you are making the effort to document your life on a daily basis. Sometimes we kick ourselves for not making the effort to get our 'proper' cameras out. But 9/10 we'll take the quick phone shot of our children, over missing the moment whilst we run off to get the big camera out. Having perfectly exposed, great quality images is of course important to us, but sometimes it's the imperfect, slightly blurry moment captured on your phone, that can turn out to be your favourite. 

We're guessing that most of you too, use your phones to capture photos of your daily life and we're here to give you a few tips on how to improve them.

1. FIND YOUR FOCUS
Decide what it is in your frame that you want to be in focus. Tap your screen and a square or circle (depending on your phone) should appear. This lets your phone know exactly what needs to be in focus. If you're taking a photo for Instagram, we suggest taking your photo outside of the app and then importing them in (for a much better quality image). The camera within Instagram doesn't have image stabilisation - helping combat shaky hands and it doesn't allow the features we talk about below.

2. COMPOSITION
The 'rule of thirds' is a golden rule within photography and simply put, means you can align things within your image to help you frame the shot and make the image visually more interesting. Without getting too technical, go into your camera settings and turn the grid ON. This will help you to compose your images. If you want to read more into this, there are plenty of articles online.

takingbetterphotos

3. EXPOSURE
Once you've selected your focus by tapping on the screen, you'll notice a little 'sun' icon appear to the right of the square. You can move this up and down to adjust the expose. If you find the image a little on the dark side, move the sun up and this will make the image brighter. Be careful not to over-expose though, you want to make sure you still have all the detail in the highlights. Slightly under-expose (make darker) is a safe option as you can fix in the editing.

takingbetterphotos

4. LIGHTS OFF
Try to always work with the natural light around you - artificial lighting from ceiling lights causes horrible colour casts and you want to avoid this where possible. Window light is your friend! If you can, move your subject towards the window light and have them either facing the light (so the light is behind you) or side on.

5. USE YOUR HANDS
Whilst shooting into the light on a DSLR can make some beautiful images, it's harder to control when using your phone. Hold your hand out in front of you and see how the light falls across the back of your hand. Does it fall into shadow? Move it around and see how the light changes. This is so simple but is a really great trick to work out the best lighting. When you work out where the light looks the nicest across your hand, you'll know which direction to have your subjects face. 

6. EDITING
There are so many editing apps you can use but a firm favourite of ours is VSCO. It's free to download with lots of free filters. If you are looking to take your photography up a gear, and happy to spend a bit, there are in-app purchases too. The pricing is really reasonable, paying about 99p for a filter and upgrading to VSCO X gives you access to all their filters and the ability to edit videos too - giving your work a really consistent look.

takingbetterphotos

There are so many filters to choose from within different apps and the obvious way to edit your photos is through Instagram. However, our advice is to stay away from those filters! But decide what YOU like and find one that suits your style. Our advice is to use the filter after you've got the exposure nailed, and use them sparingly! VSCO gives you the ability to control how much of the filter is used on the image. Our style is very natural, so it's important to us to not go too crazy with adjustments. But again, find what works for you. Once you have the image just as you want, you can save to camera roll straight from the app and have the image ready to use however you like (and upload to Instagram from there).

We hope you've found these tips helpful! Let us know if you try any of them out! xo

Comment

Comment

How To Plan Stress-Free Group Shots

We all know the importance of group shots at weddings. This is generally the only day in your life where you have everyone you love the most, in one place. Why wouldn't you get some images of you together? However, these images can sometimes be stressful to arrange. Here are our top tips on how to avoid the stress, and work quickly through them so you can get back to mingling and having a great time!

group_photography_weddings

PLAN CAREFULLY
Try to limit the total number of groups to 8-10 (or fewer if possible).
 
Think back to when you have been a guest at a wedding… which wedding was the best: the one where you spent an hour being called out for photographs? Or the one where you don’t even remember the photos taking place?
We think we know the answer! For this reason, try to keep your list of group shots to a minimum. Sit down with your fiancé before the wedding and work out who you want in each shot. Be realistic and ask yourself why you want these photos. Will they go in the album, a frame or on the wall? And maybe if they’ll go in none of these places, then perhaps they aren't necessary after all. 
 

group_photography_weddings

LEAVE ENOUGH TIME
We aim to do the group shots in 20 – 30 minutes. Because at the end of the day, this is your wedding day, so we aim to get you back to your party as soon as possible!
The average time to get people to the location and set up for group photographs is roughly 3-5 minutes per shot. If you opt for an “everybody” shot, this can take much longer (approx. 10-15 minutes).

PHOTOGRAPHERS HELPER
We don't know everyone at your wedding, so delegate the job of rounding up the guests to a member of the wedding party, normally an usher or bridesmaid (or both) and make sure they are on hand to work with us. Your group shots will be much more efficient and painless if you have your groups ready and waiting to be photographed. Make sure everyone who is in a group shots knows in advance when and where they will be needed. You don’t want Nan nipping off to the loo at the crucial moment!

NOT EVERYONE LIKES THEIR PHOTO TAKEN
Not everyone wants their photo taken. At least one guest will shy away and try to hide behind someone else. This can prolong the photographs and make for an awkward image. If this is the case, we don’t mind, but it’d be great to let us know or just discreetly let them know they can opt out of the image if they wish.

group_photography_weddings

TICK TO THE PLAN
We will ask you for the list of group shots before the wedding day - please try and stick to that list as best as possible. There have been occasions when a family relative has ‘hijacked’ us and asked us to take numerous unscheduled group shots. This eats into personal time with your guests and your portraits - a situation best avoided. So be decisive with your group list, and stick with it!
It’s also good to have a backup plan for the location of the shots. You may want them on the steps outside of the church, but you may find it rains or the sun is too harsh on the day. Trust in us and we’ll find the perfect setting for your images!

group_photography_weddings

GET CREATIVE
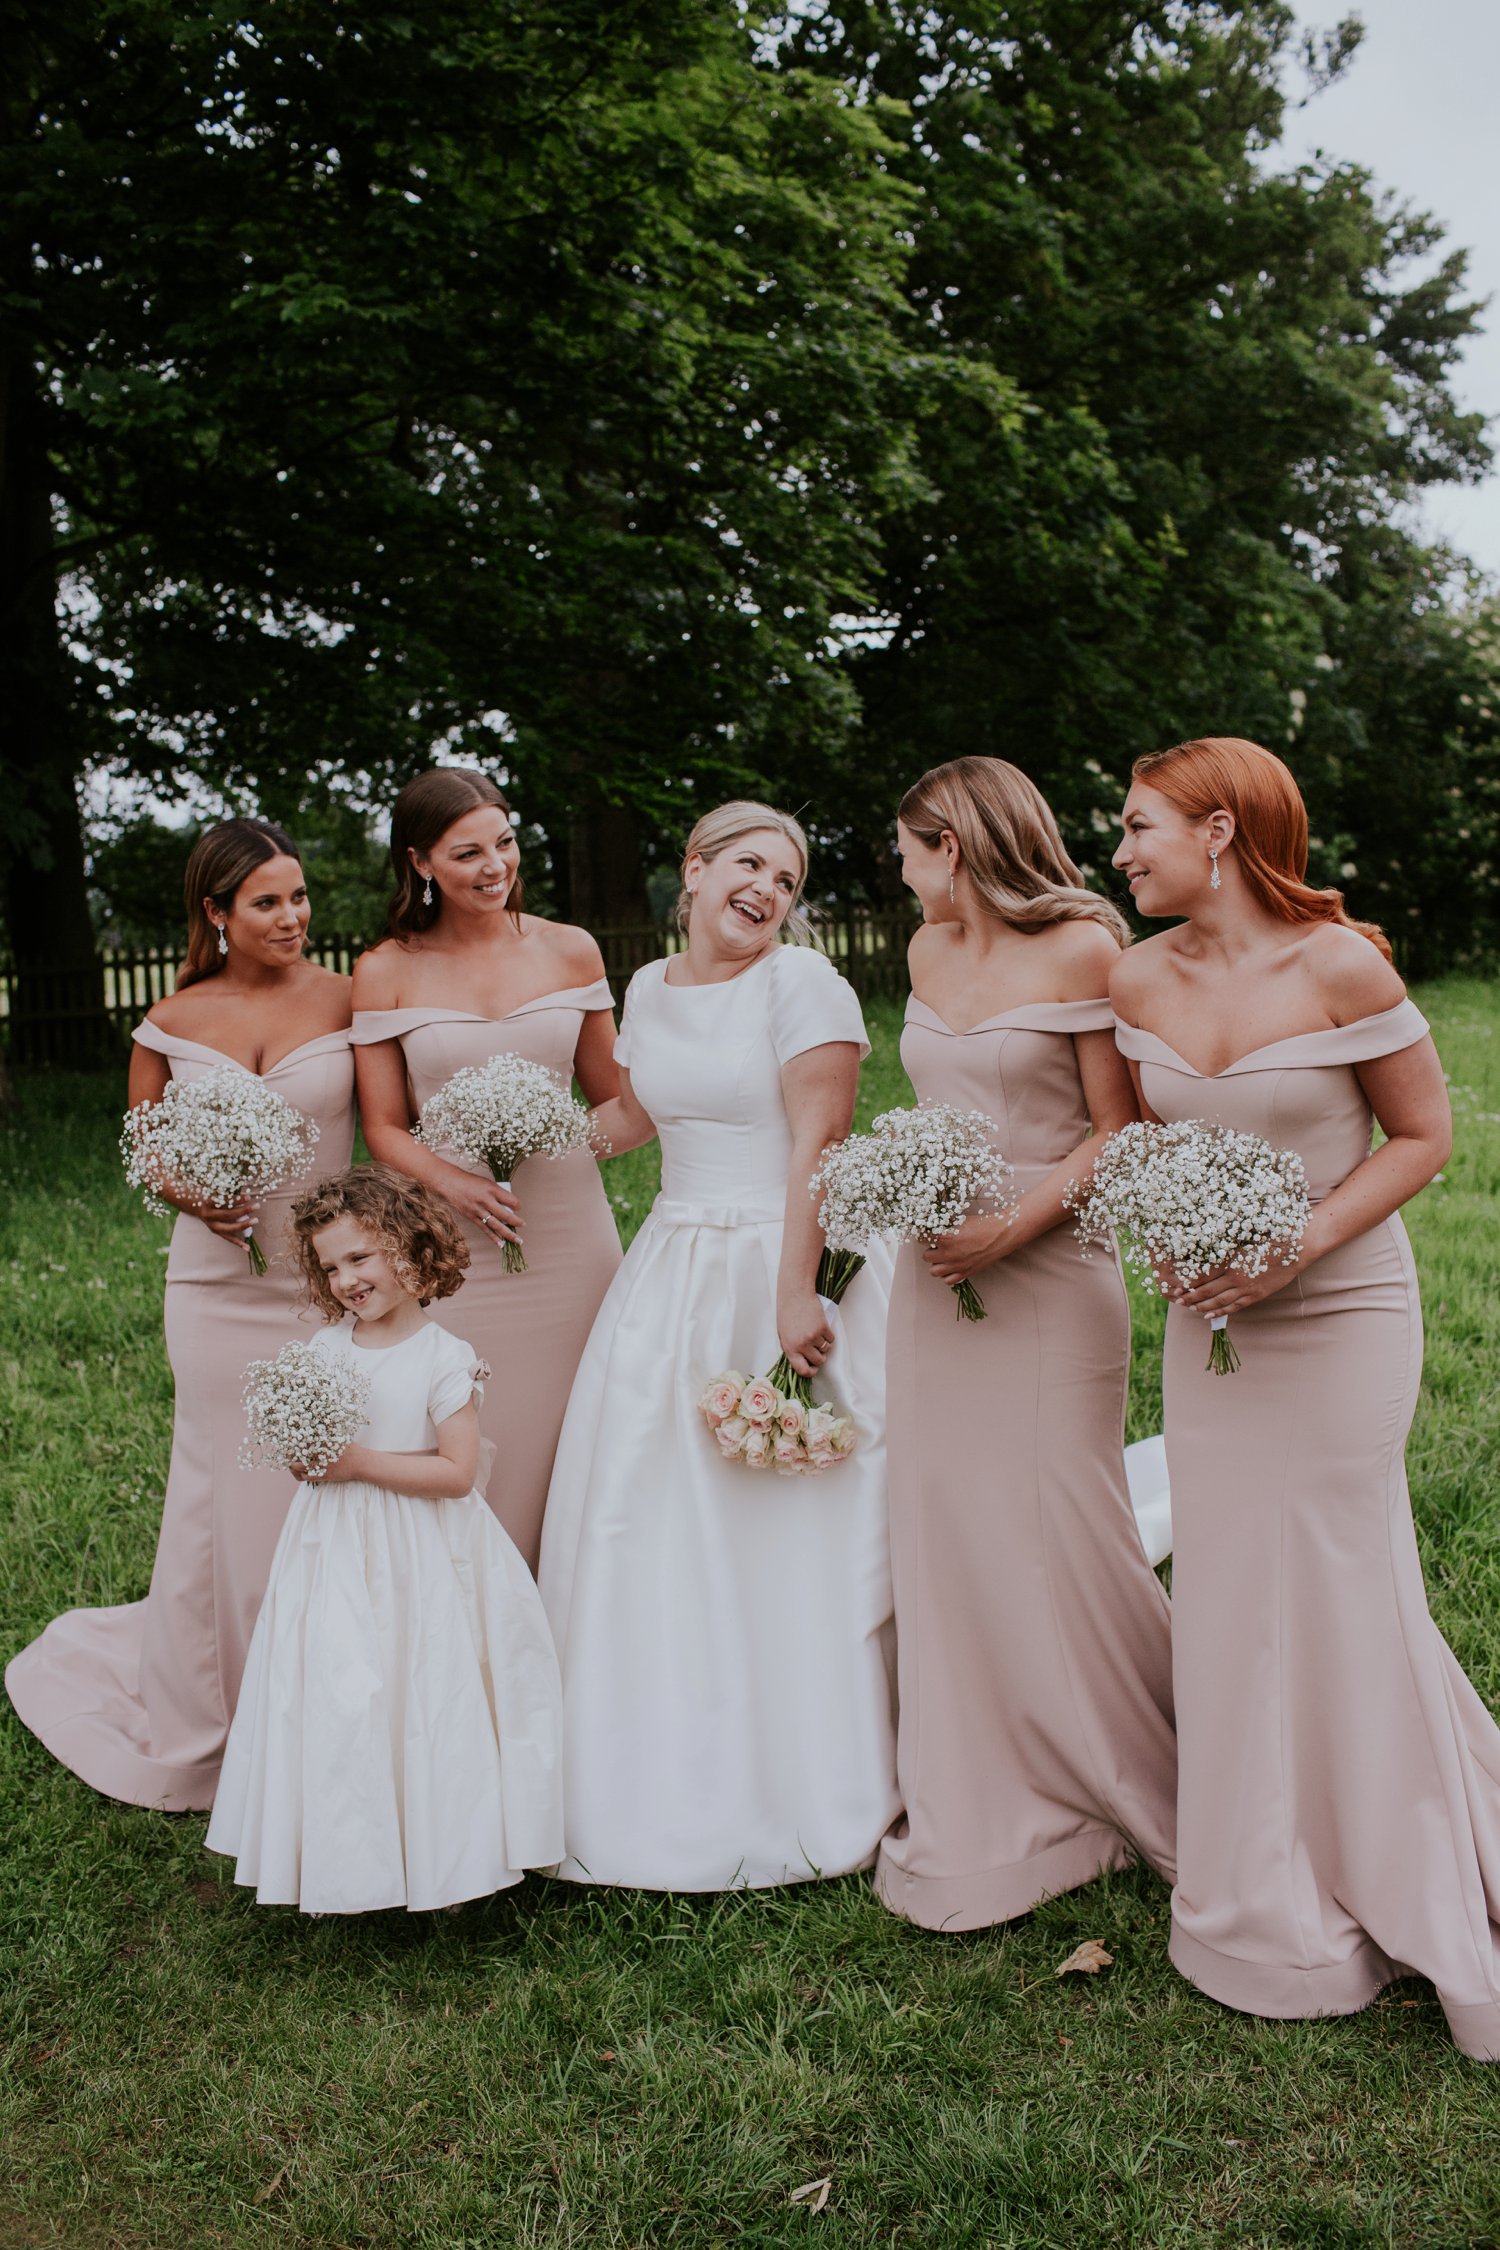
Think how these photos are going to look in frames around your home! Providing you only have a short shot-list, make the most of this time and get creative. Trust in us to choose a great backdrop (lighting is the most important thing, there is nothing worse than everyone squinting because it’s so bright) and have fun. Allow some time for fun images of your Bridal Party (Bridesmaids and Groomsmen) too!

group_photography_weddings

KEEPING IT RELAXED
It’s often possible to capture some lovely images while people are actually moving into position or waiting for the photography to start. These can sometimes make nicer shots than the ones where people are looking at the camera. Give someone the job of keeping everyone’s glass filled up. Keeping everyone hydrated will keep everyone smiling and often more co-operative! It’s a good idea to mention this to your venue.

natural_wedding_photography


IT'S YOUR DAY
Above everything... this is YOUR day. It's only going to happen once. We want to make sure you’re happy with your decisions regarding group shots. If you want lots, that’s totally fine with us. Just make sure the suggested time is allowed.
 
We hope you’ve found this information useful! Jade and Emma xx

Comment

Comment

5 top tips for planning your Wedding Photography

Here are some tips that we hope you'll find useful. There is so much to think about whilst planning your wedding, so below you'll find our TOP TIPS for getting the most out of your Wedding Photography.

1. SPACE
It’s important to consider your surroundings when deciding where you’ll get ready on the morning of your wedding. You could choose to get ready at your own home, your parents’ house, or maybe a hotel. Wherever it is, please pay attention to the space you’ll have around you. Once you have your makeup artist, hairdresser and other bridal party members in the room with you, plus a photographer and potentially a videographer, it can get a little crowded! So plan ahead. Think about who will be there with you on the morning of the wedding and try to find somewhere with enough room for all of you.

chatsworth_house_wedding

2. LIGHT
Consider the light. A top tip from us is to turn off artificial light in the room - it can set off a really horrible colour in the photos and that’s definitely something to be avoided. Natural and directional side light coming through windows is beautiful and ensures much more flattering imagery.

Stancliffe_Hall_Wedding

3. TIMING
It’s all in the timing. We can't stress this enough! Allow more time to get ready than you think. Our advice is to have bridesmaids all dressed and ready to go 1 hour before you are due to leave for the ceremony. This then allows them time to help you into your dress, leaving plenty of time for beautiful portraits of you all before leaving. With some careful planning, we can help you to get the best out of your time with us.

bridesmaids_inspiration

4. DAYLIGHT
Light plays a huge part in the final result of your images. And that’s why we feel we need to talk about it some more! Weddings in the summertime obviously have greater amount of daylight - giving more outdoor photo opportunities. Weddings in the summer allow for beautiful golden-hour light in the evenings, which is perfect for portraits. This is so important to consider if these are the types of images that you’re hoping for. Remember to schedule this time in with your Wedding Planner/ Co-ordinator, as this will likely fall within your wedding meal. If you are getting married in the winter, daylight is limited - so it is worth considering a First Look and planning your ceremony as early as possible to make the most of the natural light.

bath_somerset_wedding

5. TRUST US AND RELAX!
We hope that if you’ve booked us to shoot your wedding, then it’s because you love what we do! It’s our job to capture your day, so let us do just that, whilst you relax and have the best day. When you’re happy and smiling and having fun - it’s an absolute joy to photograph. There may be things that don’t always go to plan. We get it - you’ve planned, planned and planned some more for this day. So when something doesn’t quite go right, it can be upsetting. But honestly, try to relax and just go with the flow. Let go of the small stuff and enjoy everything about the day.

highgatehouse_wedding

We hope you’ve found some of these tips helpful! If you’re looking for a wedding photographer in Northamptonshire, Derbyshire or beyond - get in touch!

Comment

Comment

4 tips on how to get the most out of your Engagement session 

Engagement shoots...They're not everyone's cup of tea. But we love them! Here are our 4 TOP TIPS on how to get the most out of your Engagement session  - and why we think they’re so important!
 

P&D_68.jpg
Laura & Joe Engaged-106.jpg


  1. Don’t shy away!
    Engagement sessions come as part of some of our wedding packages and we feel they are extremely important. It’s a chance for us to get to know YOU, and for you to get to know US. It’ll likely be the only time we’ll meet or spend some time together before the big day and we want you to feel relaxed around us and get used to our shooting style.

  2. Feel good
    We want you to feel your best when you have these photos taken - because when you feel good it really does show in the photos. If you think you’ll feel more confident having had your hair or your makeup done - then do it! Maybe tie it in with having your wedding hair and makeup trial. We want you to feel comfortable in these photos - so if that means dressing up, then do it. If jeans and tee’s are more your thing, then wear that! Be happy, be comfortable and relax.

  3. Location
    Think about the types of images you want from this shoot. If being at home, chilling in your comfy clothes, drinking hot chocolate together is your thing, then we can plan a shoot to capture you doing just that. This type of shoot creates more lifestyle images and takes on a bit more of an editorial look. Or if you have a specific location in mind, then that can take on a whole different look. Think striking scenery and an amazing backdrop - creating a real sense of adventure within the images. We will happily chat with you about what you’d like from this shoot.

  4. Relax
    Try to forget about us being there! We know that may sound ridiculous, because having a camera pointed towards you is a pretty hard thing to ignore. But what we mean by that is we want you to focus on each other. We may direct you into a certain place, but mainly we’re considering the light and how good it’ll make you look - we’re not thinking about what you’re doing or saying to each other. Sometimes we’ll direct you, by asking you do something - like taking a walk, and these directions are what create the natural looking images. It’s completely normal to feel awkward in the first 10 minutes of a shoot - but don’t worry, you’ll be surprised how quickly you relax into it.
    We may direct you to do something, but these directions are flexible and we want to give you freedom to move around and have fun! Try to focus on each other. It’s stressful in the run-up to the wedding, so take it as some time to just be together.

    We hope you enjoyed some of these tips for getting the most out of your Engagement Session! Get in touch to book yours now

P&D_32.jpg
Laura & Ian Engaged-90.jpg

Comment

googlec25a1cc07d185800.html